Linux Setup for Practicals
The MEC4126F practicals will require a way for you to develop code either through an IDE or text editor for STM32. If you do not have either setup from a previous course, please follow the guide below after ensuring that your system is up to date by running:
$ sudo apt-get update && sudo apt-get upgrade
Setting up C and STM32 programming on Linux distributions can be relatively painless compared to Windows, or to a lesser extent MacOS. The instructions below were developed on Ubuntu 24.04 ‘Noble’, but should work on other distributions similarly.
Table of Contents
Visual Studio Code (IDE)
The preferred IDE for MEC4126F STM32 programming is Visual Studio Code (VSC), since we can standardise the installation over multiple operating systems. There are two ways to install it. The first way is to use apt. To complete this first find the deb file from the following URL: Visual Studio Code. From the URL choose the version of VSC that you prefer the most and download it to a directory that you can find. You can also use wget to manage the download:
$ mkdir ~/VSC && wget https://code.visualstudio.com/sha/download?build=stable&os=linux-deb-x64 -P ~/VSC #assuming Debian/Ubuntu distro
Then use apt to install the deb file:
# if you used the wget method
$ sudo apt install ~/VSC/linux-deb-x64
# otherwise
$ sudo apt install ./<file>.deb
Your VSC should now be ready to be used. If you would prefer to use snap, you can also download and install VSC through snap:
$ sudo snap install --classic code # or code-insiders
C Programming in VSC
Your first task is to make sure your operating system can compile and run C code. For this, a C compiler is needed. There are several options that you can use but Ubuntu comes with GCC (Gnu C Compiler) pre-installed, however you can check that you have it by running:
$ gcc -v
If it is not installed, you will have to install it manually - find and follow online instructions for your particular distribution.
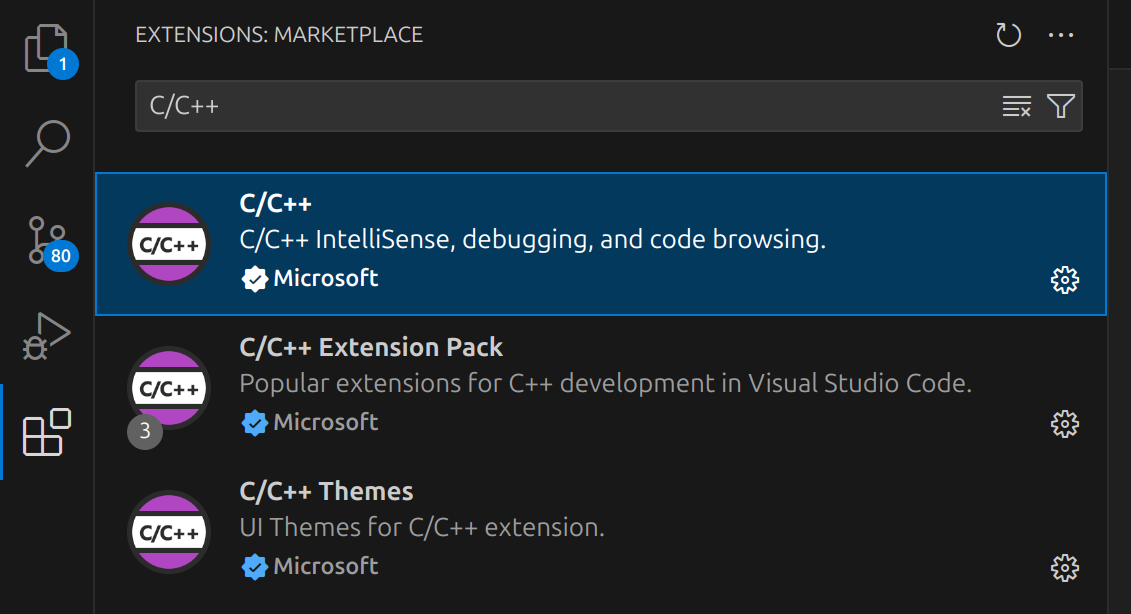
Additionally, you should install Microsoft’s C/C++ Extension for VSCode, which includes debugging and intellisense functionality. It is available under the extensions menu on the left hand side of VSCode’s GUI. The C/C++ Extension Pack also includes some other useful tools, and can also be installed.
Once the desired extensions are installed, create a new file called hello.c. Inside, include code as follows:
#include <stdio.h>

int main() {
   printf("Hello, world!\n");
   return 0;
}
This file is also available under ./setup/Resources/hello.c.
Save the file, and try and compile the program. Open a new terminal in VSCode with Terminal → New Terminal menu at the top left of the GUI or the keyboard shortcut and run:
$ gcc hello.c -o hello
This should compile hello.c into an executable hello which can now be run. In the same terminal, run:
$ ./hello
You should see output similar to the following as output:

STM32 Programming
Compiling and flashing code for your STM32 with VSCode is done primarily through the PlatformIO extension.
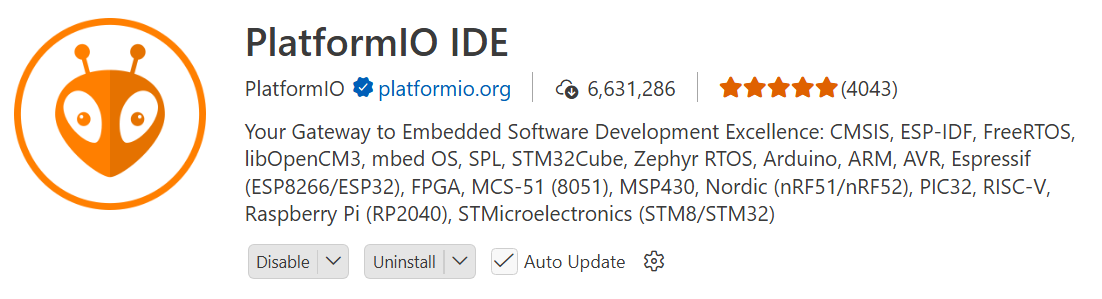
This extension is available in the extensions marketplace, similar to the C/C++ Extension already installed. Go ahead and install it now. You may also need to install Python to make this work.
While it is installing, you may be asked to install other pre-requisites in a pop-up in the bottom right of the screen. If you see this pop-up, accept and install anything requested.
If you don’t see any pop-ups, that is fine - you will be prompted in the next step.
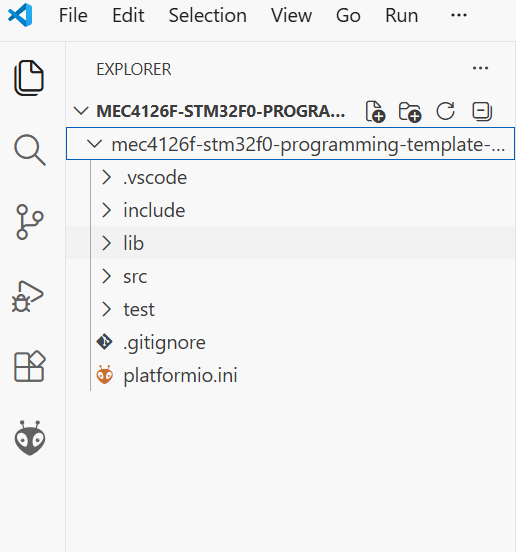
Once the PlatformIO extension is installed, download the MEC4126F STM32 Programming Template available in its own GitHub repo. Save it to a convenient location (either use git clone … or download as a .zip file and extract) and open the folder in VSCode using File → Open Folder ...
Once it is open, you should see the following file directory:
Open a new VS Code Window and click on the PlatformIO extension icon (the bug face) and then Create New Project once the initialisation is complete. Then click New Project which will take you to this screen:
You at this point see three blue blocks, and a message saying the extension cannot find the build tools. In this case, simply select Install Build Tools from the menu, and wait for them to finish installing. This may take a while - the arm-eabi-gcc toolchain is about 1.5GB once it is unpacked.
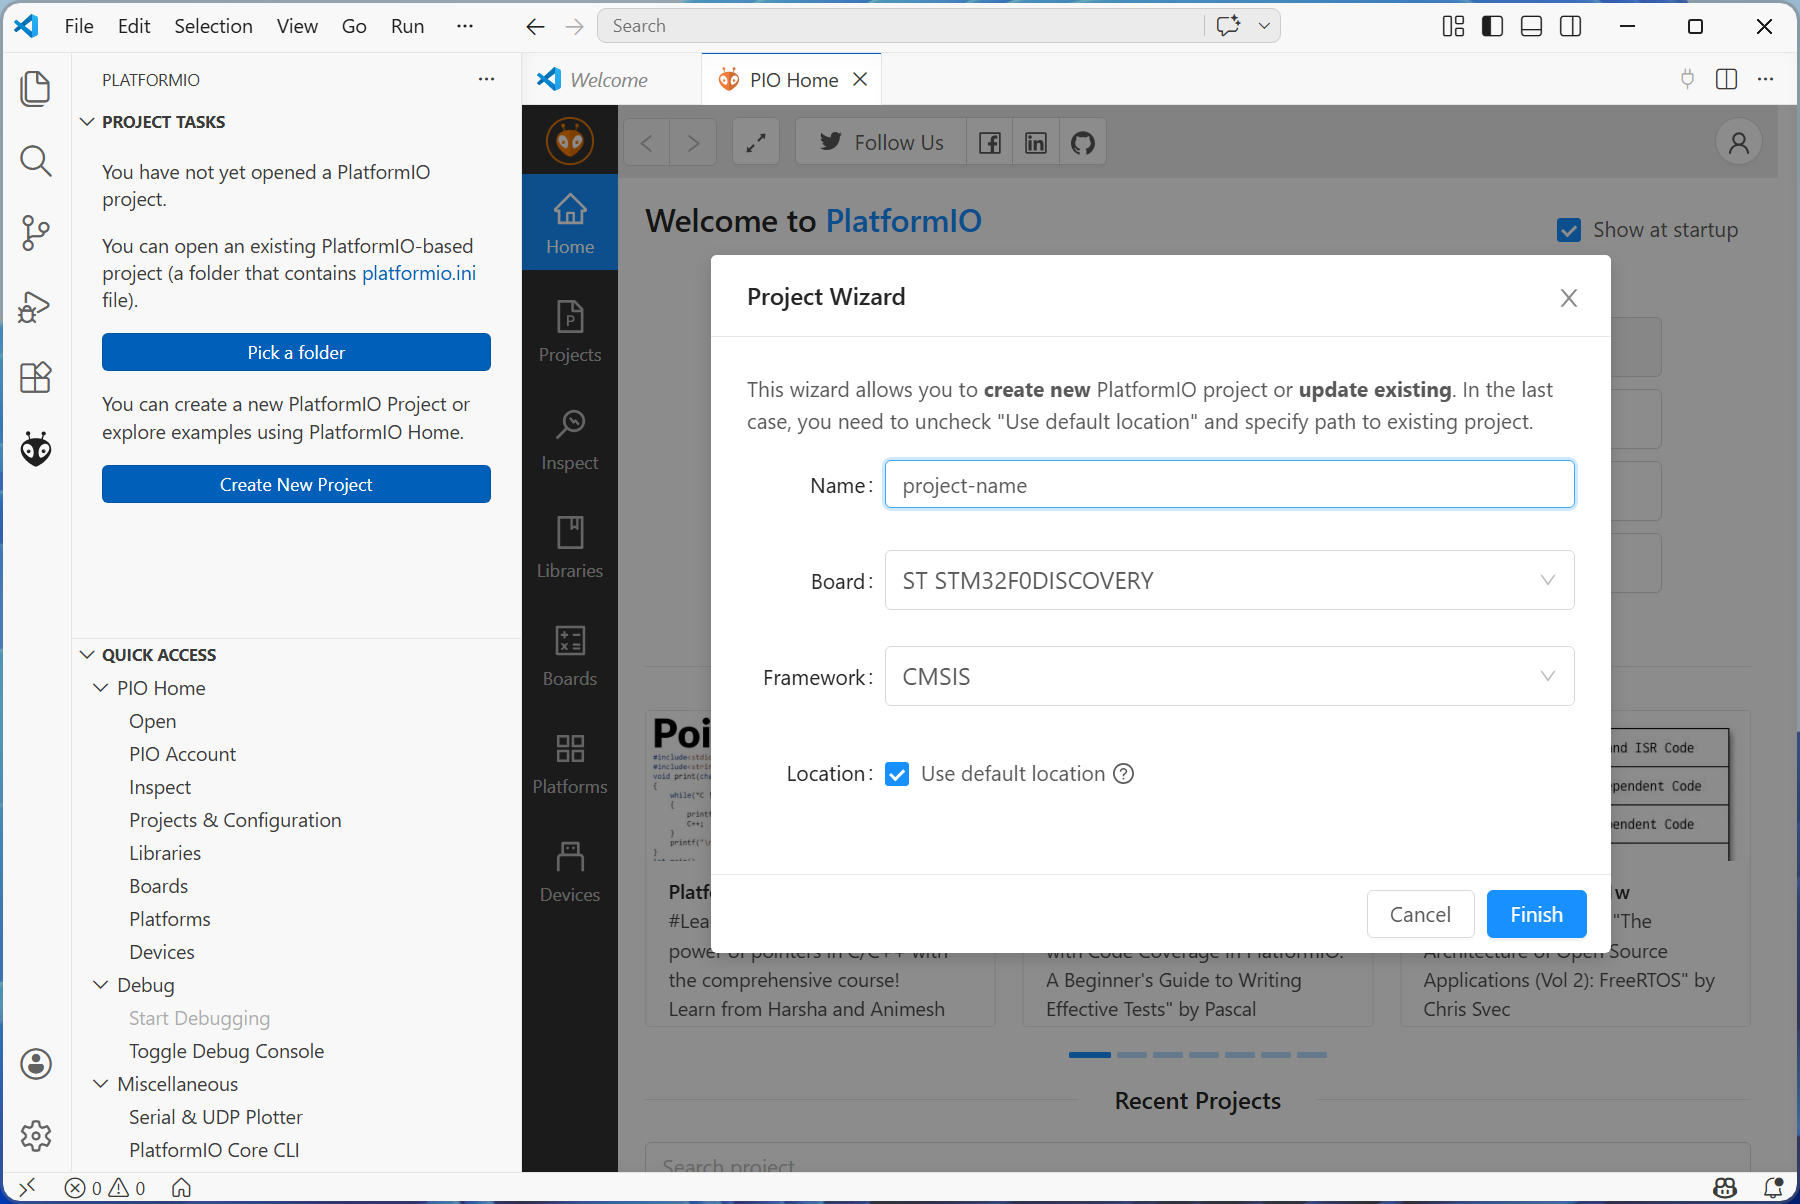
If the build tools are found, you should see a menu like the one below:
Here, you will need to give your new project a name, choose the ST STM32F0DISCOVERY board, and the CMSIS framework. You can either use the default location or choose one.
Once your new project has opened, replace the src and lib folders with those from the template which you should still have open.
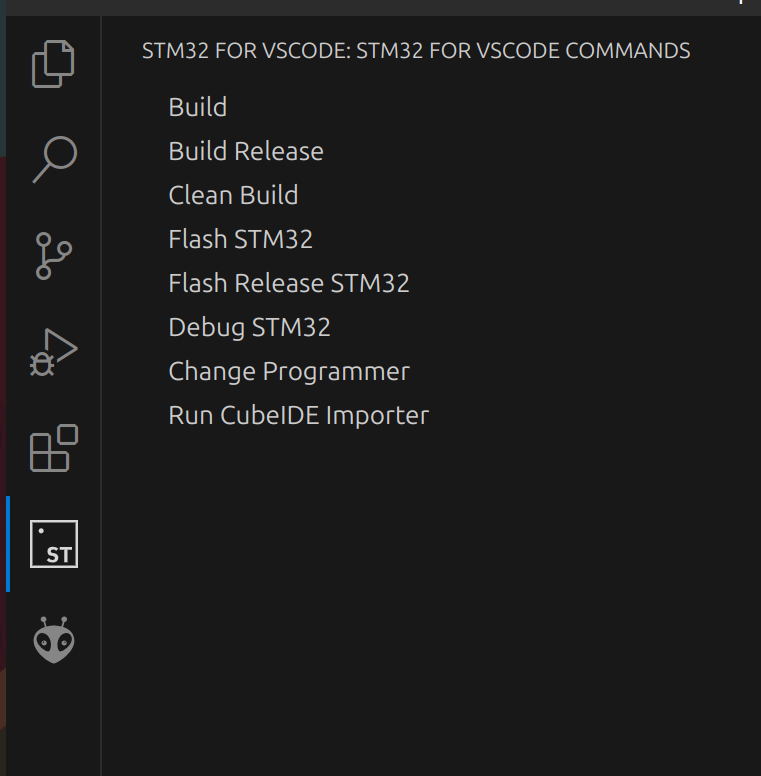
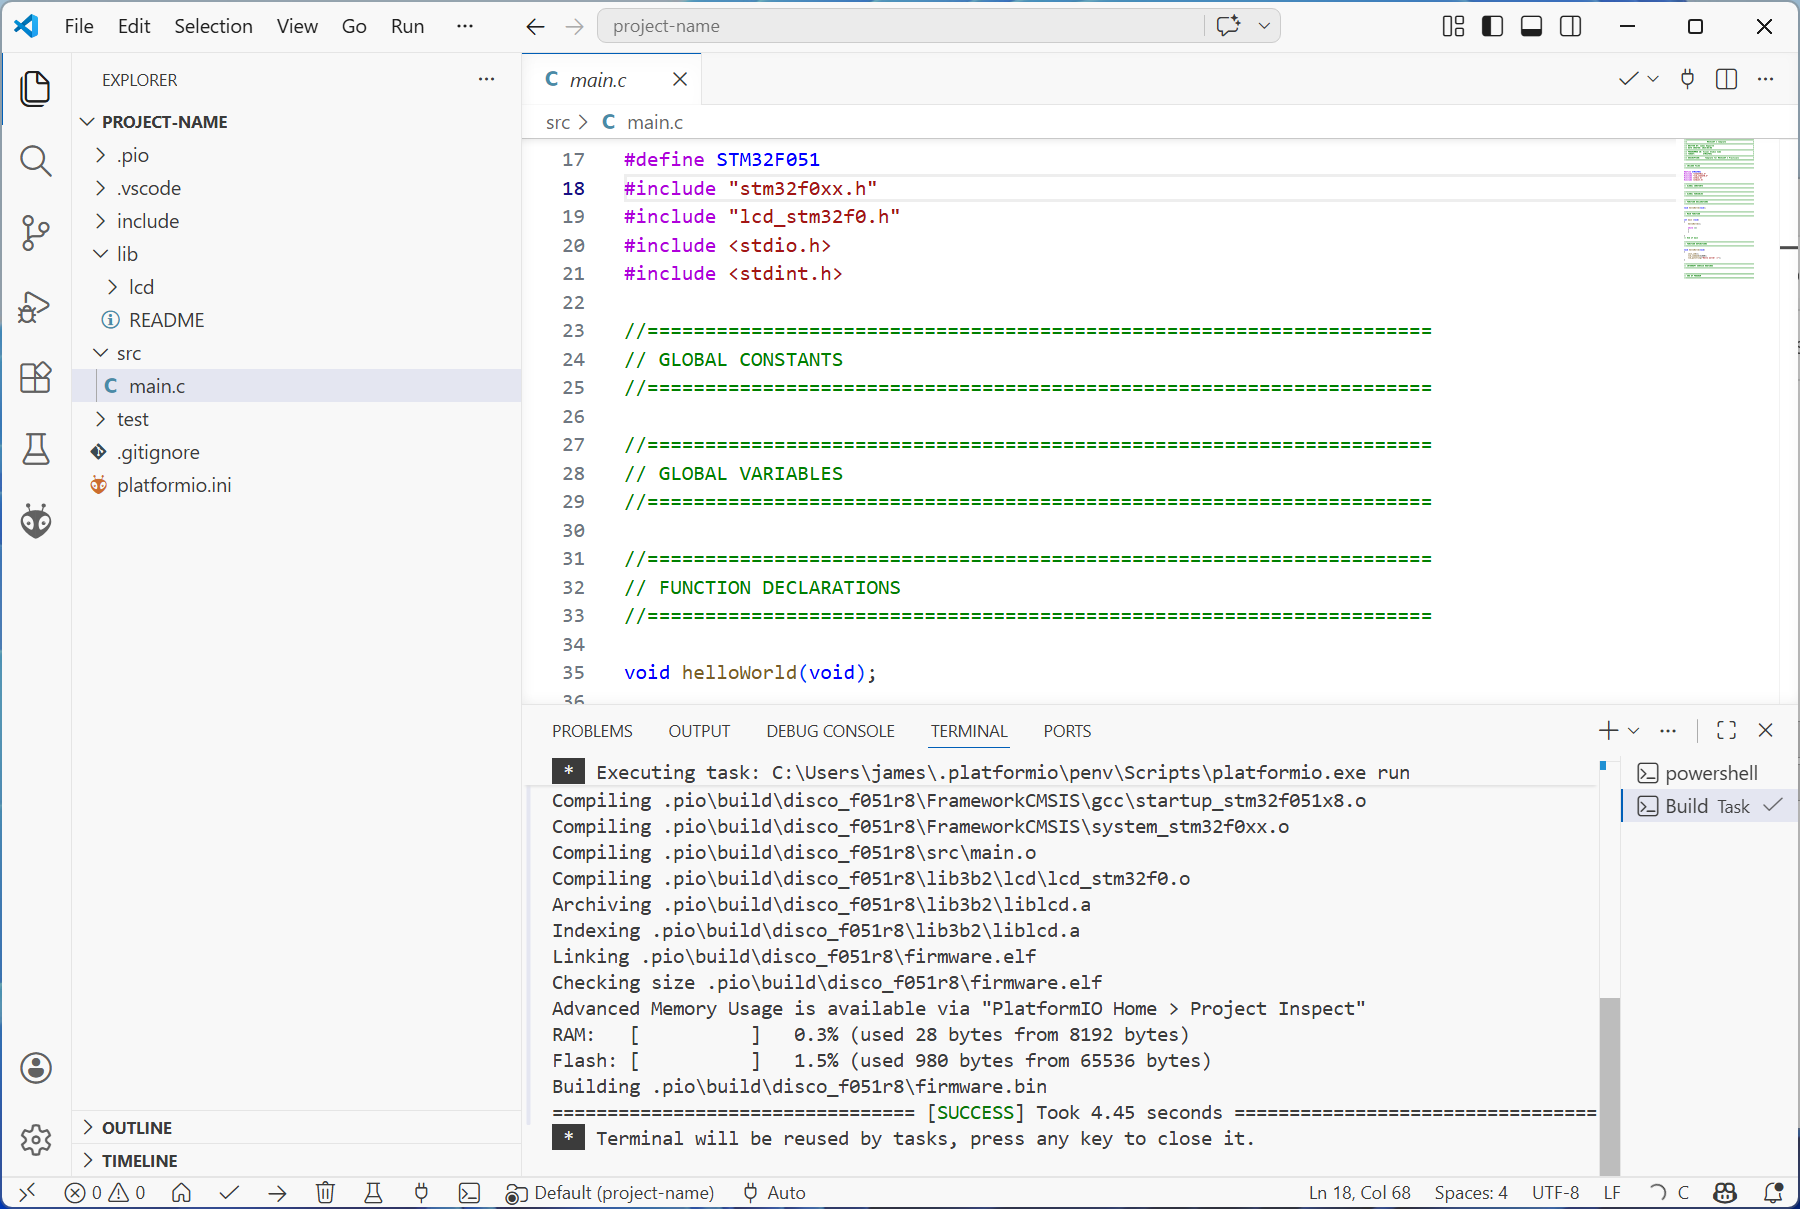
At this point, you can plug in your STM32 Development Board. Select Build (the tick mark in the top right corner) to build the demo program. If successful, you will see “SUCCESS” in the terminal window:
Then navigate to the Run and Debug view and click the play icon to Start Debugging. Your STM32 board should now flash with the code provided, and display Hello World :) on the attached LCD.
Terminal
Setup
If you prefer to use the traditional approach to C programming we suggest using the following recipe. To begin you will require GCC (for C Compiling), GIT (for package management), make (for managing C compilation) and stlink-tools (for flashing).
$ sudo apt-get install gcc make git stlink-tools
Before continuing, connect your STM32 dev board to your computer and run st-info --probe. You should then get an output that looks something like the following:
$ st-info --probe
Found 1 stlink programmers
  version:    V2J42
  serial:     39FF6D064153383741371857
  flash:      32768 (pagesize: 1024)
  sram:       8192
  chipid:     0x440
  dev-type:   STM32F05x
We can now grab STM32 Programming Template from the course git page. You can do this with two methods, the first is to simply clone the whole repo or we can complete a sparse checkout. To clone the whole repo run:
$ git clone https://github.com/MechatronicSystems-Group/Integrated-Embedded-Systems.git
To complete the sparse checkout we can run the following commands:
Sparse checkout was introduced in Git 2.25.0, check your Git version before continuing.
$ git clone https://github.com/MechatronicSystems-Group/Integrated-Embedded-Systems.git --no-checkout
$ cd Integrated-Embedded-Systems
$ git sparse-checkout init
$ git sparse-checkout set STM32-Programming-Template
$ git checkout
You are now ready to create C programs for your STM32 dev board.
Programming and Flashing
You can use your favourite flavour of text editor/IDE to develop your C code in ./STM32 Programming Template/Core/SRC/main.c. When you have written your first program, we need a way to build the program and flash it to the dev board. The program can be built quite easily with make. Ensure that your CWD is ./STM32 Programming Template and run make with:
$ make
To flash we will use st-flash and will use make to control the flashing process. To complete this add the following lines to the Makefile somewhere near line 177:
Make is whitespace sensitive! Do not expand tabs to spaces. Ensure there is a tab on the second line of the recipe.
flash: $(BUILD_DIR)/$(TARGET).bin
    st-flash --reset write $< 0x8000000
You should now be able to flash to the dev board br running:
$ make flash
STM32CubeIDE
The STM32CubeIDE is another method that can be used to develop C/C++ code for STM projects. This IDE is based off the Eclipse IDE (an IDE first used for Java). It is not recommanded that you use the STM32CubeIDE, however it is an alternative IDE to VSCode if desired, and was used previously in the course. It is also already installed on EM101 PCs, which is beneficial if you wish to use them for code development, as the VSCode toolchain must be installed every time the computers are used. The legacy installation instructions for STM32CubeIDE for Windows and Mac are included in /setup/resources. Linux users are hoped to have better taste, and installation instructions are not provided.